R.E.D for a more real life...

Day 2. The dawn broke yesterday, the clouds delivered a fresh year filled with rain and many of us starting resolutions, detoxes, and life plans.

For me, for the family and for freckles, 2018 is about reassessment and realignment. Working through the mental mind map.

As a runner it would be a waste to see this R.E.D month as a way to just shift some of those added Lindt delights, or help the jeans buttons meet once again. In fact, it would be in direct competition with the campaign.

Each and every run will be spent as a space and time to dwell on those re-word’s, to think about the person I used to be, the person I am now and the person I want to become and the place I want to be. And then figure out how to fill that gap.

In a previous life I had the perfect nails, the desirable handbag, the ironed hair. It was a life filled with stuff, but all that stuff failed to actually fulfil my life.

My journey away from this has been a long time coming, the steps quicken by some wonderful women I have met along the way. The miles pushed on with a daily meditation, a retreat and some back to basic’s life changes.

So, hello day 2. It’s been a good start, but then I am only 26 hours in!

Animal-influenced headwear

The need it list

·         Felt

·         Fabric Pens

·         Gems

·         Glue (we used a fabric glue)

·         Headband

·         Cardboard (or you could use starch to stiffen the felt)

·         Glue gun (you could use fabric glue and let it dry – glue gun is more instant!)

The knowhow

As some of you may know the freckles/parker household is off on a festival trip – this would be filled with a serious amount of schoolgirl excitement IF the Boo was not having a total yogurt-induced meltdown on the floor and Bea had not had a teenager-style strop prior to the dinner. Grrrr….!!

But, the show does go on and another stage is just around the corner, right?? So to focus on this show. In festival spirit Bea requested some fancy dress and ‘something to put on my head’. We don’t lack this kinda stuff but I thought it was an opportune moment for another make! Hence the gem-overload headwear!

1.       Cut the felt into whatever animal your little one requests – Bea went for rabbits, I think influenced from a recent farm visit – lucky it wasn’t a Zoo – not sure I would have stretched to that!! When cutting you want the shape to wrap around the headband, so fold the fabric in half and cut with the fold at the bottom.

2.       Now its decoration time – we went for pens and gems (not because they rhyme obv!), Bea had a high old time with the pink gems (not overly surprising!), and spent ages making her extra special! When using the glue I got her to use cotton wool buds (easy to throw after) to apply the glue to the felt and then add the gem on top. Obviously any penning should happen first!

3.       Insert drying time – over night or through the middle of the day really. To stiffen (and take the rather hefty weight of the gems), I added some cardboard in-between the two ear flaps. I secured these with a little bit of glue from the glue gun and then, when that was dry, glued around the edges of the felt shape and cardboard (making sure there is a good amount on the bottom flap that secures to the headband) and wrapped around the headband.

The awesome thing about this project? Minimal mummy effort, maximum kiddie fun. That sounds like my kinda craft (in fact I even managed to have a nice shower, exfoliate and apply some getting-festival-ready fake tan!).

We’d love to see if you made this – just use the hashtag #monthofmake and tag us on Instagram (@freckandfire) so we can marvel at your makes!

Collective clay creation

The need it list

·         Air dry clay

·         Cookie cutter (we obv went with the star. Bea obv argued for the heart)

·         Acrylic paints

·         Paint brushes

·         Paint tray (or recycled yogurt pots of course – waste not want not and all that!)

·         Table covering (ESSENTIAL in our house)

·         Straw

·         Stick

·         Yarn or thread

The knowhow

Now I am not sure if you remember – or even if you read it – but a few makes ago we talked about air dry clay and how unbelievably awesome it is! The kids love playing with it and I can always find some use for it!

So here we have it another make centred around this brilliant clay stuff!

1.       If your little one is a hands-in kinda kid this is a brilliant step! Break off a clump of clay and get them rolling it about and warming it up. The roll it out as well as you can. Thinking about your surface here – you don’t want to do this on an oil skin cloth or something – it will make a pattern at the back and leave a residue that I am not 100% convinced will be the best eating place for dinner time! The clay comes off really easily once dry, so we normally just do it on the table!

2.       Once they have had fun rolling and pressing it’s time for the cookie cutter – not explanation needed really. Press and cut! Now find something (we used a straw) to place a hole in the top and bottom of the shape.  Place the shapes onto a window sill, tray or something that it will easily dry overnight. And leave. Clean up those whiter than white hands!!!  You may need to turn the shapes over mid dry to get the air to the other side.

3.       So, all dry and ready for painting! I loved the fact that Bea and Boo did this together – both of them happily spent 30 minutes or so, painting away, creating their own little designs to bring together! I could hear Bea explaining to Bea about different shapes and patterns – super cute and great bonding time for them and dinner cooking time for me!

4.       The paints (if you are using acrylic) should dry fairly quickly so the next step doesn’t mean too much waiting! Tie the bottom of a shape to the top of another, we did 4 sets of 3 stars and 1 set of 2 stars to hang in the middle. Mixing both of the guy’s creations so it really was a collection creation! I got Bea to do some of the threading and Boo then had a go – good motor skill development I like to think!!

5.       Attach yarn to the top of the top shape and then attach this to the stick. With another long piece of yarn or thread tie a knot in one end and then a knot in the other with the other end of yarn to create a hanger.

And you are done, dilly, done, done. I honestly love the fact that these guys have created this together and they are both super proud of it!! Now – to get this project house sorted so that I can find somewhere nice to hang it rather than blue, paper stripped walls!!

We’d love to see if you made this – just use the hashtag #monthofmake and tag us on Instagram (@freckandfire) so we can marvel at your makes!

Flower-enhanced egg creation

The need it list

·         Eggs (not broken!)

·         Acrylic paints (we use Americano ones from Hobbycraft, or any craft store!)

·         Paintbrush

·         Paint pot or old yogurt pot

·         Skewer or stick to hold egg in decorating place!

·         Pressed flowers (see our flower pressing tutorial here )

·         Mod podge (I guess you could use PVA but tbh this is such a great glue and used for so much it’s a great addition to your craft cupboard!)

·         String or yarn (we used some left over Jersey yarn)

·         Glue gun (again, I guess you could use normal glue but we use a glue gun for so much that it’s worth having in the house!)

The knowhow

So I have recovered from Boo’s car destruction – just about… he is still very sheepish this morning but I am going to remind him of his actions until he is at least 47….

But I am going to craft the anger away! So onto today’s #monthofmake! I love this one – mainly because I love the fact that we are using something that normally goes straight into the bin, but also because we have chickens I feel like I owe it to them to make use of the hard-egg-laying-efforts!

1.       So the first job is to blow the eggs. Do this when you are either making a cake that asks for beaten eggs or making some scrambled eggs. Make sure you wash the egg first – especially if it is coming straight from the garden! Make a small-ish (3mm or so) in one end and then a bigger hole at the other end. Get your little one to blow through the smaller hole directing the bottom hole into a bowl. Bea LOVED doing this – I can’t believe I didn’t get any pictures, we were both so engrossed in the task!

2.       Once they have all been blown they need a little washing. We used warm water and filled up the egg and, holding both of the holes shut, give them a good shake. Let them dry with a hole pointing down on a tea-towel.

3.       Now that they are all dry we can get crafting. Find some instrument to pop the egg onto – we used a wooden skewer. This just helps with all that painting that is about to commence! You may need to give it two coats and leave it to dry in-between.

4.       So, let’s get decorating with those flowers. Pop some of the mod podge onto the egg and lay the flower on top. Being very careful, as the petals are super fragile when dried, glue over the top. Bea went to town on this and applied a SERIOUS amount of glue – I didn’t know how that would turn out but it was fine! So apparently, in this instance less is not more!

5.       Once you have decorated your flowers around the egg and given a top layer to seal, leave overnight.

6.       Now, grab the glue gun and whatever hanging thread you are going to use and stick the thread in one of the blowing holes. Now Pop a little glue in the top and let it cool.

TaDa! I am not sure where bea intends to hang these in her room but she is determined to find a little display space!! We may need a bigger house!!

We’d love to see if you made this – just use the hashtag #monthofmake and tag us on Instagram (@freckandfire) so we can marvel at your makes!

A little glitter and pom pom magic goes a long way...

The need it list

·         Pom Poms – you can use any size, we used some tiny ones hanging about in the cupboard.

·         Sticks – now is the perfect time to don the wellies head to the woods, a park or even the garden to find some brilliant fallen tree branches.

·         Acorn cups – see above for location!

·         Glue gun (we use a cool gun from Hobbycraft so Bea, aged 5, can help with all the gluing stages)

·         Glue – we use mod podge for most things as it dry’s quickly and is waterproof!

·         Glitter!! Oh we know its messy – just paper up underneath and the clear up shouldn’t be too bad – and hoover! Don’t be tempted to get the dustpan and brush out!!

·         Paintbrush or foam brush – again head to Poundland – they have a great craft section filled with these bits!

The knowhow

IT IS COMING. Summer is most certainly on its way, and what a day it has been! It seems just right to get a little bit crafty with those fallen trees and maybe even some of those acorn cups that are hanging around the woods at the moment!

1.       Give your sticks a bit of a rub down – esp if they have been in the messy mud, dogs mouth, or lying about growing moss! A nice easy step (although we’ve always been a bit impatient with the whole prep thing!)

2.       Apply the glue directly onto the stick and the glitter away – make sure you have paper underneath and you can then use the fallen glitter again! What is it with kids and glitter? My guys just love it and I have to say it does transform the stick somewhat! You want to keep some areas clear of glitter so that the pom pom’s will stick properly!

3.       This is a waiting step – we recommend an overnight wait – it will make sure the glue and glitter become great friends. If you want to be doubly sure of no glitter spillage later on, put another layer of glue over the top of the glitter – this will secure it forever!!

4.       Now it comes to the pom poms, acorn cups and glue gun! It’s fairly easy stuff – glue the pom pom into the acorn cup and then leave to dry, then glue the cup onto the stick. You can of course just attach the pom pom directly to the stick, we did both which looked ace.

5.       Now add to a vase filled with a bit of sand and put in pride of place on the table. We’ve already made a few and they look great – even better is how proud Bea is showing people (including the Postman!) her handmade creation!

And there we have it! Another week of #monthofmake complete – and we’ve kicked started our week! Tomorrow we shall be thinking up a nice little craft to use all those eggs we seem to get through (is anyone else little ones OBSESSED with scrambled eggs??).

We’d love to see if you made this – just use the hashtag #monthofmake and tag us on Instagram (@freckandfire) so we can marvel at your makes!

Perfectly perfect peg hanger

The need it list

·         Pegs

·         Americana acrylic paint (Hobbycraft always has a great colour selection)

·         paint brush (poundland, poundland, poundland!)

·         pots (we used shot glasses from poundland!)

·         PVA glue (see the above store, where would our craft cupboard be without it?)

·         Glitter

·         Bakers twine or old picture frame (we used this to create an awesome noticeboard!)

The knowhow

If your little ones are anything like ours, then school and nursery pick-ups mean hands and arms constantly filled with a serious amount of mark-making drawings, finger paintings and creative sticking! In fact, the large pile has got a little out of control recently and it’s always felt a bit of a shame that the these much-loved masterpieces don’t really see much light (but don’t get us wrong – we have ‘the week’ cupboard where things are ‘filed’ and if not mentioned again within that week, get ‘archived’ into the big council pick up once a fortnight…

But we thought a cool craft to get your little ones creating their own peg wall hanger or notice board for those MUST-DARN-WELL-NOT-DROP-THIS-BALL invites, letters and pretty pictures!!

1.       First job – cover your area and your kid! We like to layout all the colours for them to make their own selection and colour combinations with.

2.       So, onto the first layer of paint. If you are using the Americano paint it will dry pretty quick, by the time you have finished the first peg should be dry. Then it’s onto the second ‘design’ layer – they can just dab the paint or you could get all creative with a toothpick and use this to make marks (think bakewell tart!) in the second layer. You still want to see the first layer so try to encourage the creative artist that less is more in this step!!

3.       It’s possible you may need a bit of drying time here. We like to encourage a bit of tidy-up time (‘you choose it, you use it, you put it away’ is a constant mantra in our house!). NB – this doesn’t always work!!

4.       Now it’s the glitter and glue time. Be warned. This will be messy. Like the second layer, less glue is more here – you want to be able to see the designs underneath. Then it’s the sprinkling of the sparkly stuff - you could suggest that not all the pegs have glitter covering them and maybe only 3 got sparkle treatment (we tried this and failed – the two monkeys are OBSESSED with glitter!).

5.       When you are all done glittering and it has finally dried pop another layer of glue over the top (best to leave over-night) – this will help secure the glitter and stop it spreading its glittery love all over the house for the next 10 years!

6.       You are there! All you need to do now is thread the twine through the peg hole and then secure it with either some glue, tape or even a glue dot. There are other options though – you could make a notice board out of your peg designs – grab a frame (charity shop finds or bootfairs are an excellent source of frames!), remove the glass and then either paint of put fabric on the frame board and then superglue the peg to them.

And there we have it! Another week of #monthofmake complete – and it’s the weekend calling! Now – tomorrow I may have to squeeze in some of my own making time…

We’d love to see if you made this – just use the hashtag #monthofmake and tag us on Instagram (@freckandfire) so we can marvel at your makes!

Festival feather facewear!

The need it list

·         Foam sheets (from you guessed it – ze land of pound!!)

·         fabric flowers – or any form of flower power decoration

·         feathers

·         gem stickers (see first bullet for the source!)

·         Scissors

·         glue dots (yep. Poundland again)

·         Glue gun (optional)

·         pencil

·         ribbon

20170517_161857.jpg

The knowhow

This is a brilliant craft. Not only because the little lady sat for a good 30 minutes perfecting the creation. Not only because it got her looking at repeat patterns, mirror imaging and all those important learning things. But because she ROCKS this festival look!

I love it beyond and it will definitely be going in the forever box to marvel at when she is older!

1.       Cut out a mask shape from the foam sheet. DO NOT worry about making this anywhere near perfect – it’ll be covered in no time!!! Make eye holes and then use your willing assistant to make them bigger. Make sure you make the mask a good size – you’ll need quite a bit of creative space!

2.       Make a hole either side and attach the ribbon. We added a bit of glue from the glue gun to secure it in place and also used two pieces of ribbon to tie round the back.

3.       Grab a cupper, and maybe a magazine and let your little one get seriously creative! We went with big flowers first and then added the smaller ones!

4.       When it comes to glue dots, the best way to attach it to lay the flower onto the dot whilst it is still on the roll and then peel the flower off with the glue dot. We gave the feathers a bit of additional glue gun support!

And that’s a creative wrap! How easy is this one? I think these will be worn all weekend long!!

We’d love to see if you made this – just use the hashtag #monthofmake and tag us on Instagram (@freckandfire) so we can marvel at your makes!

Felting a little wristwear

The need it list

·         Wool rovings (you can get these in most crafty places now or, of course, that trusty ebay!)

·         Pipe cleaner (or 2 depending on how long you want it to be!)

·         Bamboo mat, or (if like us!) you don’t have, then bubble wrap

·         Towel

·         Bowl

·         Pipette (these are super useful for a crafty cupboard but fingers will do – it just means the water needs to be a bit cooler!)

·         Hot water

·         Soap

·         Grater

The knowhow

Welcome to the world of CLEAN CRAFTS. Can I hear a double whoop!!! This is honestly going to make them cleaner than when they started (not that I am saying anything about the state of your children, of course!). It’s also another yarn orientated craft so gets a double tick in my slightly wool-obsessed existence!!

Wet felting is great with kids – there is so much you can do with it, balls, pictures, soap covers and of course, armwear! So here’s a little tutorial to run you through the basic know how of wet felting!

1.       Depending on the length that you want, tie two pipe cleaners together. Bea wanted one that would go around her wrist a couple of times (I quite fancy having one of those upper arm wraps – do you remember them back in the day??!). At either end make a loop – this will give the felt something to attach to.

2.       Separate the rovings into longish strips. When pulling rovings apart, pull with about 30 cm gap between your hands.

3.       Starting at one end, wrap one of the strips around the loop end and then back on itself to go down the pipe cleaner. It will need to be quite tight so it maybe that you need to help tighten it a little! When you run out of roving, just attach another strip. You can add (like Bea) an accent colour in here.

4.       When you have wrapped the pipe cleaner it will be a bit ‘thick’ – the roving will felt down the water, soap and pressure! Grate a little soap into the hot water. You don’t need too much, just enough to give it a little lather (Bea ended up rubbing the soap onto the pipe cleaner after a while which actually worked quite well!).

5.       Grab the pipette, put the pipe cleaner on the bubble wrap and sprinkle with the soapy water. It does need to be quite wet but sprinkling water is important as it will gentle shock the yarn.

6.       Now it’s time to get rolling, SUPER gently at first with a little more pressure as the wool begins to felt. You need to do this for some time – I finished off with Bea watching as she got a bit bored but happy to watch!

7.       Once it is all felted, shock the fibres by running under a cold tap. If the roving is coming away from the pipe cleaner you can put more hot soapy water on it and continue felting and then repeat the same cold water treatment!

8.       Now it’s drying time. We took some excess water off with a towel and then popped in the tumble dryer for a little while and then on the radiator.

20170517_160653.jpg

INSERT one happy lady!

We’d love to see if you made this – just use the hashtag #monthofmake and tag us on Instagram (@freckandfire) so we can marvel at your makes!


Marble people...

The need it list

·         Card people (or of course you can use this to make awesome thank you cards!)

·         Shaving foam (NOT gel!)

·         Food colouring

·         Water

·         Paint tray (or yogurt pots – minus the yogurt!)

·         Pipette (or you could use a paintbrush and splatter. However get on ebay and grab some inexpensive pipettes and reuse!)

·         Metal tray (we get ours – three for £1 from ze poundland – wash them up and use time and time again!)

·         Tooth pick or kebab skewer

·         Ruler

·         Old towel


The knowhow

This is one of the most surprising crafts I have ever done! The kids love it, they hardly ever bore of it and it is a great way to get them enthused about doing mountains of thank you cards!! Today though we opted for people – I think we are going to make them into garland of some description!

1.       Get your little one to shake, shake, shake the foam bottle! Once all shaken up spray long (fairly thin) layers of foam onto the metal tray.

2.       Pop the food colouring into the tray or pots and add a little water to dilute it (the more you add the more opaque the result will be). Mix it up.

3.       Now is the fun part! Get them to put little droplets of colour all over the foam. This is a bit of an art form and obviously a bit tricky for the young ones but, practice makes perfect and it is really good at working those motor skills!

4.       Once they have all coloured up, it’s time to grab that stick and run it horizontally and vertically along the foam. I think this bit is a bit like cake icing!!

5.       Place your person or card down and with light fingers tap it down (you want to make sure the foam and colouring gets on it but the person is not drowned!).

6.       Lift it off and place on top of your towel, foam side up. Grab your ruler and, pressing quite hard, run from top to bottom, removing all the foam to reveal the AWESOME marbling!

HOW cool is that! Marble obsession. Complete.

We’d love to see if you made this – just use the hashtag #monthofmake and tag us on Instagram (@freckandfire) so we can marvel at your makes!

Tomorrow – we are going on a yarn adventure with some felting I think… And this one promises to be nice and clean!

Perfect picture pinwheel

The need it list

·         Double sided paper squares (we get ours from good old poundland – they have just brought out some sparkly paper which is awesome!! But  you could push the creative boat out and make them out of kiddies drawings on either side of a plain sheet!)

·         Scissors

·         Croc clips

·         Hole punch

·         Glue gun (or you could use double sided sticky tape or even some paper glue)

·         Split pin paper fasteners

·         Straw

The knowhow

So, the rain may be making a bit of an appearance today – but remember yesterday?? That lush heat… It’s set to return by the end of the week apparently – so get ready guys – summer IS coming….

To get into the sun spirit we’re making a age-old favourite – pin wheels! The kids love playing with them and making them is super lovely fun as well – parential win win we think!! So here you go – a very simple tutorial for a lovely make!

Make a pinwheel template – draw a 6 inch square. Find the middle point and mark it with a circle. Draw a 7cm line from each corner toward the middle point. On one side of the line in each corner draw a circle. It should look like this.

Make a copy of your template so you don’t need to do this step again!

1.       Cut out the square.                                                                               

2.       Attach the template square to the double sided paper (the paper is underneath!) square using a couple of croc clips

3.       Cut the diagonal lines.

4.       Make a hole in the middle with one edge of the scissors through both the template and the paper (mummy or daddy hands advised for this step!).

5.       Now using a hole punch (we have a racy hand held craft punch but any good old office hole punch will do!)make four holes in roughly the same position as on the template.

6.       You are now done with the template! Unclip and do away with the template, leaving just the double sided paper!

7.       Now you need to use the glue gun or double sided tape. A glue gun is best as it will hold better but if you are using tape make sure you press really hard! Put a touch of glue or tape just above a corner hole but making sure not to go over the diagonal line that you cut in step 3.

8.       Take that hole and align it to the centre hole.

9.       Repeat with each of the other 3 holes and align on top of one another until all four corners are glued (only press down on the hole not the folded edge).   

10.   Now get your split pin paper fastener and pop through the hole.

11.   Split the pin at the back and, making sure that the pin is NOT touching the paper, glue gun the straw onto the split pin. Hold in place until it’s dry (again a glue gun is perfect as it drys sooo quickly!).

12.   Head to the garden and enjoy!!

We’d love to see if you made this – just use the hashtag #monthofmake and tag us on Instagram (@freckandfire) so we can marvel at your makes!

So! Onto tomorrow – we ARE going for some after-school marbelling! I adore this craft – super easy, the kids are in their creative element and heaps of uses (but more on that tomorrow!). Oh my days – I may even mix it up with a little video! Now, that’s exciting stuff!!

Garden decorating days!

The need it list

·         Fabric

·         Sticks

·         Glue gun (or fabric glue)

·         Scissors

The knowhow

So yesterday was a weird one… How hot could it actually be? I started the day with the kids (and me!) in jumpers, woollen socks and jeans and by lunch I was applying sun cream, stripping the Boo off and reaching for the sunnies!! It felt a bit wrong to be marbling inside when all we wanted to do was be outside – so we reverted plans and started on our summer garden!

Now, as you are aware by now we live in a project house – this means that pretty much everything is a state! However, I so desperately want the garden to have a magical, whimsical feel for the kids to play, imagine and explore – so we cracked open the fabric stash and got making! First up fabric flags…

1.       Cut rectangles about 40 cm long and 15 cm high. if you worried about fabric direction you want it to be running across the length of your piece. I gave my cuts a bit of a press at this point to smarten them up (ironic really that I am ironing this when NOTHING else in the washing basket gets ironed!!)

2.       Fold in half wrongside together horizontally – so that you end up with a fold at one end of the rectangle and two open ends at the other – it should now measure about 20 cm long and 15 cm high). Now fold vertically, and cut on an angle from the bottom right to top left – make sure this is at the open end (so NOT on the fold).

3.       Open it up and grab your stick, place it in the fold. I use a glue gun for most things (if you don’t own one it will TRANSFORM your creative life!!!) and this is no exception! Run the glue around the wrongside of the fabric and over the stick. Carefully line up the flag points and press down to seal.

4.       Once all the flags have been done, I gave it all another press and used some starch to stiffen the fabric a little. FLAG COMPLETE! Now down to garden with more fabric scraps we go….

5.       I have wanted to create a ribbon tunnel for ages, I knew the kids would love it as it leads into their play area, and last year I planted a couple of Jasmine plants on a garden arch – so had the perfect spot! If you don’t have an arch, you can always create the same look by just tying on tree branches. I do this for parties and it looks amazing – you would be surprised how something so small can look so amazing and keep kids SOOO entertained!!

6.       Your little ones can help with this job - cut a long piece of fabric or netting, ours were about 2 meters. Then at the top make a snip in the fabric about 5 cm in from the edge. Now get ripping! I don’t know what it is about ripping fabric but the kids loved it – keeping them happy for at least 15 minutes! Keep on repeating until you have a nice bundle.

Look at those toddler knees!!!

Look at those toddler knees!!!

7.       Tie onto your arch or tree, pop the flags into the floor and admire! All you need now is some bubbles for some awesome garden fun (it’s no surprise that I am going to point you in the direction of poundland for the bubbles!!! Not only great value but my goodness, great quality!!).

I feel all summer-ready with this now – shame that there appears to be rain on the horizon today… HOW annoying!!

We’d love to see if you made this – just use the hashtag #monthofmake and tag us on Instagram (@freckandfire) so we can marvel at your makes!

So SATURDAY!! Whoop!!! I’m thinking it might have to be pizza making with the kiddies – it is the weekend after all!!

It's a teepee yarn story...

The need it list

·         Sticks

·         Wool

·         Garden twine (optional)

·         Scissors

·         Darning needle

·         Paper flowers (optional)

The knowhow

It actually maybe ever so slightly embarrassing that it has taken me this long to make a yarn-orientated tutorial!! But, fear not today is yarn day and we have lots of other fibre makes planned for the rest of the month! So let’s get this yarn story started!

1.       Go stick collecting! We got 6 sticks about 25cm – obviously you don’t need to follow this rule! You can make them as big and small as you like, just try and get straight ones!

2.       Use the twine to tie them together at the top – if you don’t have twine hanging around them just use yarn. Spread them out in the rough teepee shape, making sure you leave an opening space and tie some twine along each of the bottom sticks to start you shape off. Allow little one to use fingers as ‘walking legs’!!

3.       Cut a long bit of yarn and tie one end onto one of the opening sticks with a secure knot. Then tie the other end to the darning needle.

4.       Now it’s time to start weaving. Bea worked out how she wanted to weave (not at a firery independent one!!). I would suggest wrapping the needle over the top of the stick (see second pic!), then underneath it to come back towards you (pic explains it a bit better!) and then moving onto the next stick. Stop when you make it round to the other opening stick.

Bea's way!!!

Bea's way!!!

my way!!!

my way!!!

5.       Keep going round and round. When you run out of yarn, you can attach more of the same colour by making a knot or change colour by trying a knot with the existing colour onto a stick and then attaching a new colour with a knot onto the same stick. Keep calm and carry on weaving! Bea really got into the swing of this. The sun was shining, the birds singing. It was, quite frankly super peaceful and relaxing! 

6.       When you have reached the peak, tie off with a knot and adorn with paper flowers, or leaves or other decorative finds!

And ta da! You have an awesome teepee – and I have to say I think this is one of Bea’s most favourite makes! She was so calm, content with the monotony of movement! A really super way to spend some mother and daughter time!

We’d love to see if you made this – just use the hashtag #monthofmake and tag us on Instagram (@freckandfire) so we can marvel at your makes!

Tomorrow – #monthofmake number 12 – We’re edging ever so slowly toward the weekend! So what better way to celebrate than to get our marbling on! That’s a usual Thursday post-school activity, right??!!

Wonderfully (FREE!) wild garlic scones!!

The need it list

·         225g self-raising flour

·         ½ tsp salt

·         pinch cayenne pepper (we actually didn’t have any in the cupboard so left this out!)

·         1 tsp mustard powder (again – had just used this up so we went without!)

·         120g cheddar cheese

·         Good handful of wild garlic

·         50g butter at room temp

·         1 egg (we used our girls eggs so popped in two as they are little ones!)

·         milk (added to the eggs to make up 150ml in together)

·         cookie cutter

The knowhow

I cheated a bit on this one – this is not a freckles recipe. I used a basic cheese scone recipe from one of the vintage cooking books we have acquired over the years. The recipe is above, we were lacking a few ingredients and added the wild garlic. It was an experiment that paid off!!

1.       Go foraging! Find some lush wild garlic which is really rather strong at the moment! WASH LITTLE ONES HANDS!!! After a morning picking the garlic this was essential – the fingernails were gross! Heat oven at 200.

2.       Sift flour, salt, cayenne pepper and mustard powder into a large bowl.

3.       Mix in butter so that it resembles fine breadcrumbs.

4.       Stir in cheese and finely chop wild garlic and add this into the mix. Make a well in the middle of your bowl.

5.       Add milk and eggs and mix into a sticky, garlicly dough with a metal knife

6.       Pop a lot of flour onto the side and turn the dough onto that. Give it a bit knead and then roll (or to be fair we just patted out with our hands!) it to about 2.5cm. Cut it out and place it on a tray.

7.       Brush with milk (or egg, but I always found this a waste of egg!), and pop into the oven for 15 minutes.

OH MY DAYS. How LUSH are these???? Kids have literally inhaled them, they are pretty darn healthy and make a wicked after school, I-picked-that, snack!

We’d love to see if you made this – just use the hashtag #monthofmake and tag us on Instagram (@freckandfire) so we can marvel at your makes!

Tomorrow – #monthofmake number 11 – we’re going to be getting our make on with something for the older ones again (well my 5-year-going-on-15-year-old)!!

Wiggly worm wormery

The need it list

·         Container (plastic is best but you can use glass – old jars world well. We used this brilliant plastic bowl from Poundland.

·         Grit or small stones

·         mud

·         sand

·         spade (or table spoon!)

·         leaves

·         cling film

·         Soap and water for those insanely muddy hands!

The knowhow

This is your pre-make warning. This is a dirty make! Boo could practically grown carrots under his nails at the end of this, his jumper was akin to a mud mat and he had sit numerous times in muddy patches! But that’s the life of a 3-year old, right?  

1.       Get them to make piles  of sand and mud (or add them to separate pots).

2.       Pop the stones in the bottom

3.       Next – a layer of mud, get them to pop a couple of spoon’s in and pat down with their hands.

4.       Next – a layer of sand. Exactly the same process – can you see where we going with this!!

5.       Repeat steps 3 and 4 until your container or jar is all filled up and your little one is suitable filthy!

6.       Now, don the spade and go digging for worms! The more the merrier – we put in 6 but you can add and add on another rainy day or when tensions are running high in the house!

7.       Top with some green leaves, cover with cling film – making sure you are putting some air holes in the top – and ta da! Wormery is complete. Now we brought into the house because these little muddy misters seem to be our new pets but I can see how this may make some feel on the uncomfortable side! Where ever you pop them make sure they are out of direct sunlight!

Now – watch as the worms do their thang – mix up the mud and sand and compost the leaves for you! It’s quite fascinating really and is a great way to show little ones what goes on underground!

We’d love to see if you made this – just use the hashtag #monthofmake and tag us on Instagram (@freckandfire) so we can marvel at your makes!

Tomorrow – #monthofmake number 10 – double figures calling! It’s time I think to get the bake on and maybe combine with some foraging that we have been doing of late! The recipe certainly won’t be ours but maybe will inspire you to look out for this rather awesome nature creation!

#monthofmake - spaces for places

The need it list

·         Frame – we used a box frame from poundland but try charity shops and boot fairs. You will onlyneed the frame so the backing and glass can be got rid of.

·         Glue pot

·         Mod podge

·         Paintbrush

·         Fabric

·         Scissors

·         thread

·         Glue gun or strong tape

·         mini pegs

The knowhow

Can you believe this has been going one week already!! It has been a lovely thing for me actually to spend some create time with the kids rather than opt for the easy TV option while I juggle the home, dinner, and bed routine! I do hold you are finding them useful – even if you’re not doing them straight away!

So onto today!

As you may have gathered so far, Bea is a bit of a magpie. Every night, when she is meant to be sleeping (!!), she is going through all her ‘precious’ things, putting them in boxes, on her shelf, windowsill and various other spaces she has in her room. It’s actually rather lovely to listen to and peek in on (through the crack in her door!). It’s creating her sanctuary, her space.

So this make is all about facilitating more spaces for her to display her memories.

1.       Strip off backing and glass from the frame. Making sure you remove any sharp metal from around the back of the frame (you know those bits you press down to secure the frame backing – they must have a name but I am not an expert in framing!!).

2.       Cut the fabric into small little bits – depending on the age of the little one you can do this for them or let them cut it up.

3.       Glue up a small bit at a time. We started at the top of the frame so that there was a little overlap onto the sides. Place the fabric strip on top of the glue and then glue on top of the strip.

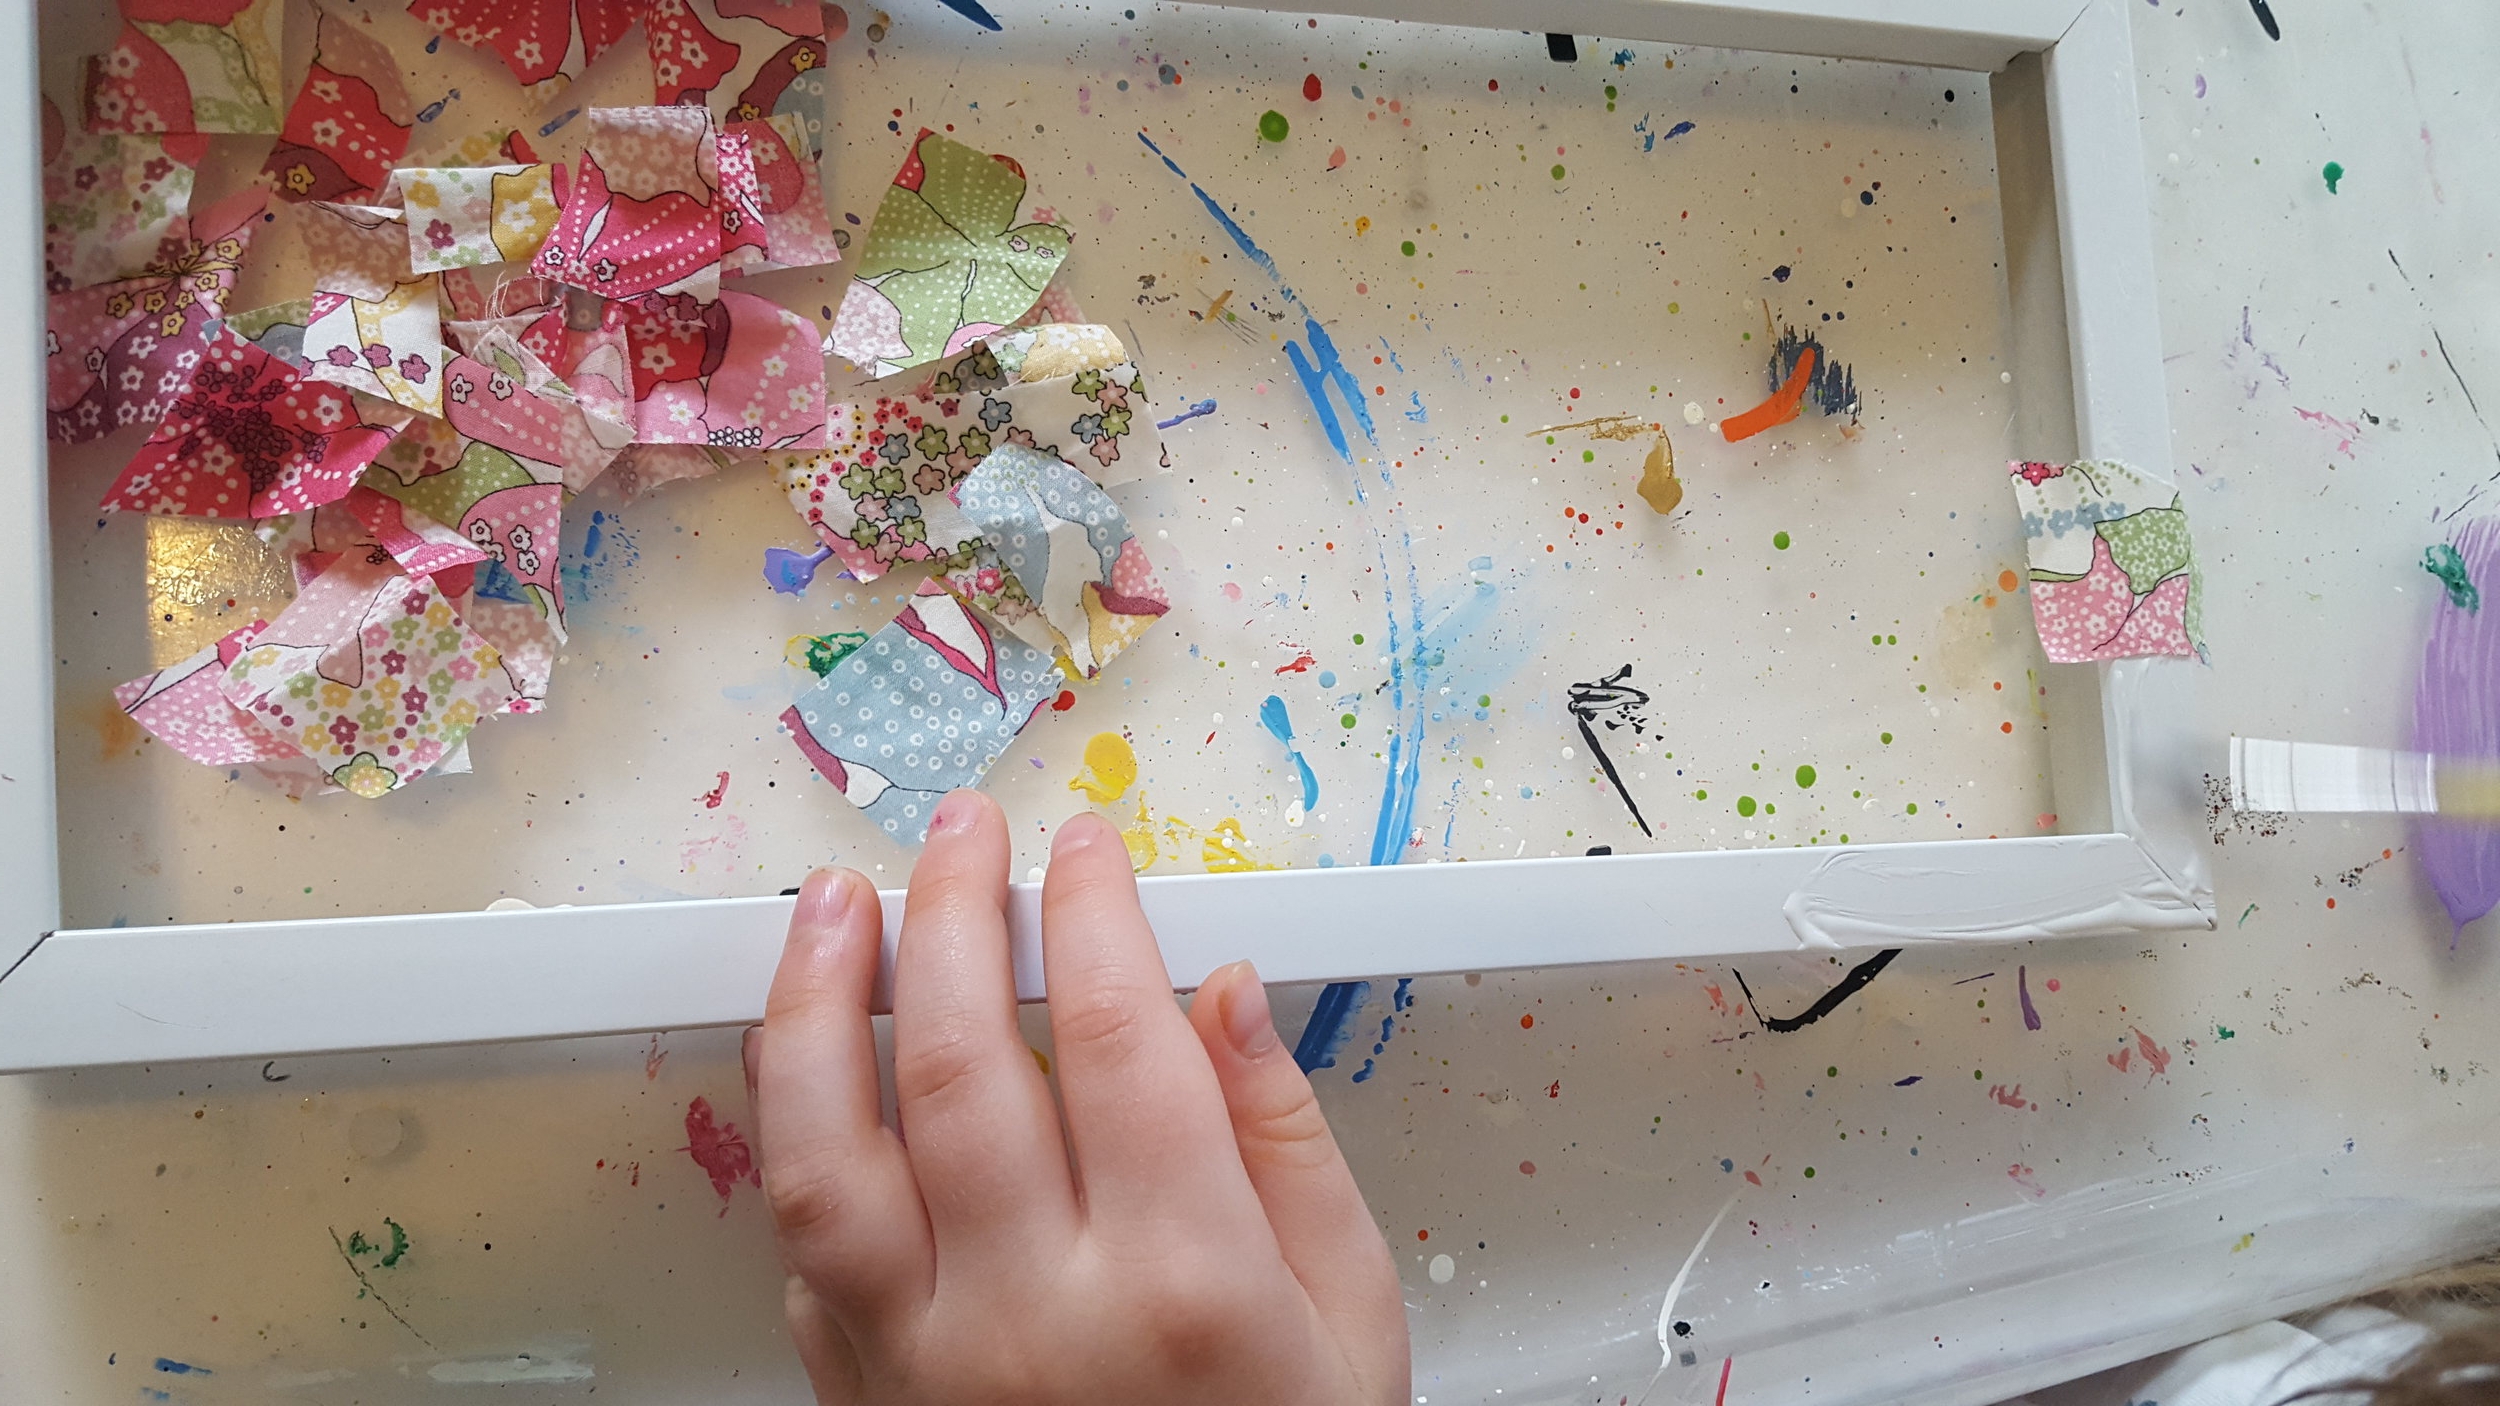
20170507_175905.jpg

4.       Place another piece fabric with a small overlap on the previous. Keep on going around . Let the top dry. Mod podge dry’s pretty quick so if you start this in the morning, give it an hour and then you will be ready for the top!

5.       Start the side in exactly the same fashion, gluing down any overhang from the top and then filling in any gaps.

6.       When you have done the sides leave to dry for another hour or so. Once it is all dry, grab some scissors and tidy up the edges if, like us, you have a lot of fabric over hanging. You may want to put another layer round the edges just to secure it after cutting.

7.       Now you are ready for the hanger. We used left over jersey yarn but you can use anything – wool, garden twine, rope etc etc. If you are using a glue gun, glue up near the top of one side and then place your twine or yarn on top. Then glue on top of the twine or yarn to keep it really secure. Let this dry.

8.       Now, pulling really tight, align up on the other side and repeat the gluing process. You’ll have to keep hold of this while is dry’s to keep the tension but it is super quick!

9.       Add pegs, and let your little one choose their precious memories to display!

We’d love to see if you made this – just use the hashtag #monthofmake and tag us on Instagram (@freckandfire) so we can marvel at your makes!

Tomorrow – #monthofmake number 9. We’re thinking something garden orientated with the Boo. Be warned – with this fire cracker involved it’s not going to be a clean create!


#monthofmake - avec fam creation

The need it list

·         card stock for waterpainting

·         watercolours

·         paintbrushes

·         water pot

The knowhow

There is not really any ‘tutorial’ for this one – maybe more like a creative idea? I have recently fallen in love with waterpainting – I’m loving the different techniques and the colourways you can produce, but the nicest thing by far? Because I have been doing this with bea she has also started to really enjoy it and feels very grown up!

I have wanted to create a family piece of art for a while. To be perfectly honest with you I wouldn’t put Mr P into the creative box. He’s more in the practical, thinking kinda box. And that’s cool, probably why we work, right?

Obviously Lady Bea had to start the creation!

Obviously Lady Bea had to start the creation!

The very patient Boo watching from his 'best friend' whilst she gave very detailed instructions!

The very patient Boo watching from his 'best friend' whilst she gave very detailed instructions!

And finally his turn comes!!

And finally his turn comes!!

And so her teaching began - taking daddy through the essential water and ink techniques!

And so her teaching began - taking daddy through the essential water and ink techniques!

But for the #monthofmake he was forced to sit with the kids, pick up a brush (check out his ‘technique’) and get his craft on!

I liked the idea of a blossom tree – please do not judge by tree trunk, or overanalyse the species…

20170507_091910.jpg

So – are you inspired? Thinking maybe of creating your own avec fam piece of art?  

We’d love to see if you made this – just use the hashtag #monthofmake and tag us on Instagram (@freckandfire) so we can marvel at your makes!

So looking to our #monthofmake number 8. Bea is OBSESSED with all things pretty and pink – so we’re going with some lovely decoupage with some of prized liberty print fabric ends!

Not so scary ghost lampshade!

The need it list

·         lampshade – we use finds from charity shops AND bootfairs, make sure you get one that looks like it will have a nice frame – look out for scallop edging, these make stunning ghost shades!

·         scissors

·         tesa tape (this is a special tape for lampshade making), or double sided sticky tape

·         fabric

·         fabric ivy, flowers, ribbon – all of these are optional – you can decorate however you like. Try feathers, buttons, making yarn tassels, pom pom’s – the creative options are endless and totally personal to you!

The knowhow

As some of you may have read a little while ago, the freckles HQ is somewhat of a project house. There are a couple of nice areas but they are limited to the little ones bedrooms! However, when this bad boy is completed I plan to have ghost frames hanging from every inch of every ceiling….

Ok – that maybe over doing it ever so slightly BUT I am going to have these beautiful makes around the house for all to admire! I don’t want to bang on here about the importance of creative pampering other than to say it is darn good for your soul. I spent a couple of hours making this, the simple repetitive task of laying fabric and I have to say it was peaceful, calming and just lovely. No noise other than the birds outside. Lush.

So here we go – I hope you like this one because it’s an absolute fav of mine!

1.       Strip your frame of any fabric, you’ll need a sharp pair of scissors here to pierce the fabric and cut any hand-sewn pieces. Once it’s all clear, marvel a little at its beauty and then give it a little clean with a cloth and some washing up liquid.

2.       While it is drying start making strips from your chosen fabric – we used liberty lawn because, quite frankly, we’re obsessed with the stuff. If you are following this #monthofmake it’s likely you will see a lot more liberty fabric pop up!! The strips we cut are about 1.5cm deep. You don’t want to make them too thick otherwise you’ll just end up wasting fabric as they will wrap over too much (this will make sense later!).

3.       Grab your tape and wrap each of the spokes apart from the bottom (you’ll do this last and you don’t want it sticking to the table!). The tesa tape has a red protective film. Keep this on until you are ready to wrap that area.

4.       We are going to start by wrapping the inner spoke, from bottom to top. Then the outer spokes – again from bottom to top, the top smaller circle, then the bottom circle or scallop edging.

5.       To start off with grab a strip of fabric and lay it on at an angle (about 45 degrees) facing upwards. Slowly wrap it around the spoke with a little overlay. Some fabrics will fray more than others (Liberty doesn’t really fray that much!), but that is all part of the charm. When you get to the top of a spoke and you have fabric left, just leave it hanging and move onto the next spoke – you will use this bit later for the top circle.

6.       Once you have done all the spokes – sit back and marvel. Now move onto the circle. Take the protective tape off and start with the left-overs from the spokes. Then fill in any gaps with more strips. If you find you are going over a bit that doesn’t have any tape on it (maybe at an end when using strips to fill in gaps) just pop a little bit of the tesa (or double sided tape) directly to the fabric, peel off the protective layer and place down.

7.       When you come to the scallop edging, or the bottom circle, turn upside down, add the tape and add the fabric.

8.       Once the fabric is all complete have a look at your creation – I love them in this naked form so you may want to keep them just like that. If you are decorating, now is the time. We used fabric ivy that I knotted at the top and then just wrapped around the spokes and then paper flowers which just wrapped with the wire. Whatever you are using make sure you attach it securely - maybe with a touch of glue is necessary. You can use the scallop edging to hang or drape from.

9.       For hanging – I don’t use these for lights but (will, once project house is complete!) use these to highlight a corner with a couple of different sizes and materials. I tied a bit of ribbon to the top ring and then at the opposite point on the same ring to create a hanger.

So – what do you think? Are you in love? I adore the fact that each frame will be different in size and design – makes each one feel unique and one of a kind!

We’d love to see if you made this – just use the hashtag #monthofmake and tag us on Instagram (@freckandfire) so we can marvel at your makes!

So looking to our #monthofmake number 7! As it’s a Sunday I thought it would be nice to do a family make that combines everyone! So watch this space for a creative pampering avec the fam!


#monthofmake - sun-stallation (finally!)

The need it list

·         table protector

·         card

·         yellow, red, orange paints

·         paint tray (or recycled yogurt pots, margarine boxes etc)

·         spoons or foam brushes

·         cling film

·         cotton wool buds

·         canvas board

·         glue

·         double sided sticky tape or glue dots

·         cotton wool

·         hanging thread (we used left over jersey yarn)

·         tape

The knowhow

So sun-stallation. Here is it! The Boo decided to have a great day and was actually so excited to do this – although he requested that we wait for Bea so that they could craft together – very cute! I had initially thought that this might be a bit too young for her (the grand age of 5) – but actually she really enjoyed it and it worked out to be a nice after school activity where I could then jump between them and the dinner (without the 500 requests for tv time – in fact as soon as they had finished they went and happily played mums and babies for ages!).

So again – this is not the most polished craft but hopefully these tutorials are just giving you some easy creative ideas to at home without heaps of materials and time!

1.       Protect your table with a large cloth (we get ours from pound land as they are really rather good and get used time and time again!). Cut a circle (about the size of a breakfast bowl) out of card – if you are doing this with older ones, get them to trace around the bowl and then cut it out – and then lay a big sheet of cling film directly down onto the table cover with the circle of top.

2.       Get them to spoon various colours onto the card – mixing really doesn’t matter here, it’s all part of the paint fun! You know that saying ‘less is more’? Not here. More is definitely more.

20170504_180422.jpg

3.       Once enough paint has been added, place another large piece of cling film over the top of the circle and then get them to ‘squish’ it all over, Bea totally mixed her’s together while Boo wanted to only do light taps so that the colours were clear! It’s totally up to them and their creative spirit!!

4.       Once they have finished squishing, get the canvas ready (we brought ours from poundland again!) and pop some glue dots in the top left hand corner. place the circle ontop so that part of it is coming off the canvas. Take away the cling film and replace with the canvas, painted card and some cotton wool buds.

5.       Now starting from the top (or anywhere really!) of the circle get them to draw a line along the painted circle, off and onto the canvas (this will make the sun rays). Do this lots and lots of times!!

6.       Once they are all done with the rays it’s time for a few clouds. Get your little one to glue up at various points around the picture (going over the rays if they wish) and then placing tiny bits of cotton wool onto the glue!

7.       It’s drying time! Ours dried overnight so they actually saw it hung up when they came down for breakfast! Cut the overhand of the circle, grab the yarn or hanging thread – cover with a bit of tape at the back and there you have it – a lovely mid-week, proud-to-have-on-the-wall piece of sun artwork!

We’d love to see if you made this – just use the hashtag #monthofmake and tag us on Instagram (@freckandfire) so we can marvel at your makes!

Now tomorrow – it’s Saturday. That can only mean one thing, after 5 days of lovely kiddie makes it’s time to have an adult pampering session! This one is inspired by a lovely friend and my absolute love (and mild addiction) to ghost lampshades! All to be revealed tomorrow!


#monthofmake - Creating your own forever flowers

The need it list

·         flowers

·         little hands

·         2 x pieces of tissue paper

·         2 x pieces corrugated cardboard (we used the sides of a delivery box)

·         heavy books

·         two glass sheets (we went to the local poundshop and brought two cheap frames and used the glass sheets from there)

·         glue (we used diamond glaze because we had it in the cupboard but you could use a small dab of pva ) or double sided sticking tape

·         paintbrush or cotton wool bud

·         tweezers

·         washi tape (these are all over the place now – if you’re not in any rush jump onto ebay for an awesome selection)

The knowhow

Honestly I think there is something a little bit special about flower pressing – I don’t know what it is – maybe it feels right to be preserving their utter beauty in time, it rights the wrong of the initial picking somehow!!

So at the moment we don’t have many flowers in the freckles HQ – a project house with little bloom! But we do have a LOT of forget me nots, and actually one of my – I love the simplicity of the flower, how small and powerful they seem with their stunning colours. So, this craft is sooo perfect for us right now – a way to keep their memory of 2017 forever! And what kid doesn’t like flower picking? Although, and I speak from dire experience, set the boundaries – the last thing you want is them picking all the flowers during a visit to the grandparents – really really not good apparently!!

1.       So little hands at the ready,  grab a bowl and get picking! You could get them to pick just the petals or the whole flower and even think about getting some follage – our next press is going to be some ferns, their print is everywhere at the moment! At this point we were talking a lot about the flowers, what they liked about them and why, what made them different from one another, what they needed to make them grow – you get the idea! It made it more into an adventure. Bea decided that if forget me nots had a name they would be called scarlet and would be friends with the daisy’s in the grass as they were similar sizes! sweet!!

20170429_172025.jpg

2.       Get your books ready (the benefit of being married to a lawyer – there is A LOT of boring and very heavy books in our house!). Place one piece of the cardboard down on top of a book or tray (just so you can easily move it around!), the tissue paper on top and then lay out the flowers. We left a little gap in-between ours to allow the flower to spread.

3.       Now place another piece of tissue paper on top of the flowers, then other piece of corrugated cardboard and then the heaviest (or a selection of books) on top.

4.       And wait. We left ours for about 5 days but forget me nots seem to press quickly. Bigger flowers would take a bit longer.

5.       Once they are all pressed it’s time to get creative! Make sure you clean your glass before starting – fingerprints sitting alongside precious flowers is NOT the point! Dab a spot of glue onto the location you will be placing the flower. Taking the flowers off is a job to do together as it needs to be done super carefully – especially with the small ones! Start at the stem and slowly peel away from the paper (as if you were taking stickers off!). Pop the flower head onto the glue – making sure that the front of the flower is facing you and the back is against the glue).

6.       Once they are all on, let them dry for a little while – about an hour.

7.       Now pop the other sheet on top, making sure you pander to my OCD and align the two layers up perfectly!!  Grab the washi tape and press down on the front, top and other side (you want to make sure that the back piece of washi isn’t longer than the front and therefore show through – we started with the sides just to give us error room!).

8.       Once all the sides are done you can give the glass a quick clean and marvel at their beauty! This make is destined for the little lady's room, I think it goes so well next to her prized trinkets!

We’d love to see if you made this – just use the hashtag #monthofmake and tag us on Instagram (@freckandfire) so we can marvel at your makes!

Now tomorrow – we’re going to attempt that sun-stallation again. The Boo appears to be in a slightly better place, but let’s be honest – this is a changeable toddler world we live in!


#monthofmake - Finding the treasure...!

The need it list

·         white fabric

·         sharpie or fabric pens (or normal felt tips- just check them first so they don’t bleed on the fabric)

·         table protector (we always use this old food tray and it has worked wonders – I love how it is paint splattered and pen marked, tells its own creative story and one day we will mount all on its own on the wall!)

·         embroidery hoop

·         scissors

·         needle and thread

·         glue (we used fabric glue but PVA should work fine!)

·         paintbrush

·         felt

·         Heavy books.

The knowhow

So I am critically aware we promised you a sun-stallation – but this particular activity involved the crafting soul of Boo – the 3-year old and yesterday WAS NOT HIS DAY. You know one of those days when you’re counting the hours till bedtime and it is only 10am? Yesterday was that day!

So we tweaked the creative plan and engaged the creative soul of Bea –the always-up-for-a-bit-of-crafting 5 year old! So now you actually have one of my favourites and a so so simple activity! Our treasure may hoop!

1.       Make sure you set up and use the table protector – I cannot feel responsible for lovely tables and cloths being ruined with the use of sharpies – nothing gets those ink marks out!!

look at that cheeky grin!

look at that cheeky grin!

2.       Give you little some guidelines to work with – I just drew around the hoop in pencil so she could see where her creation needed to be.

3.       Now – let them draw their little scene! Obviously it doesn’t have to be a treasure map – Bea is doing this for Boo’s bedroom – it can be any little creation that they want! Bea has started to really enjoy drawing and making flower people, rainbows and hearts!!

4.       We used the sides of the fabric (which will later be cut and thrown away) to test the pens and any illustrative ideas!!

5.       Once the masterpiece is complete place the drawing on top of the inside of the hoop and then the outer on top of the fabric – making sure you align the top of the drawing with the metal secure. Twist the screw to make sure it is nice and tight.

6.       Now cut around the cloth - about an inch. Depending on the age of your little one they can help with this – it’s good cutting skills!

7.       Grab your needle and thread, pop a knot in the end (we doubled over the thread as it needs to be a bit strong for pulling tight at the end) and stitch around the inside skirt of the fabric (about ½ inch in). When you reach the starting point give it a bit of a tug so that it pulls tight, tie this tight by making a series of small stitches over the top of one another – making sure you don’t lose the tension from the skirt!

8.       Grab the glue and paintbrush and apply a good layer onto the back of the wooden hoop and a little onto the fabric skirt. Place felt on top and then the heavy books on top (you may want to add a layer of grease proof paper between the felt and book in case of any seepage (we didn’t and it was ok but better to be on the safe side when writing these things I guess!!).

9.       Let the glue dry over-night and then cut off the excess felt (or course you don’t actually need the felt – I am just a bit OCD when it comes to the finishing touches! You could just stop at step 7 and place straight onto the wall.

And that’s the lot for this lovely tutorial. I adore this way of mounting their artwork – it looks super modern, is heaps cheaper than getting framed and we think looks a million times better!!!

We’d love to see if you made this – just use the hashtag #monthofmake and tag us on Instagram (@freckandfire) so we can marvel at your makes!

Now tomorrow – we’re going to do some flower pressing and make something rather special from the little beauties! We will get back to the sun-stallation, just when the Boo decides to take off his grumpy two shoes!!!